

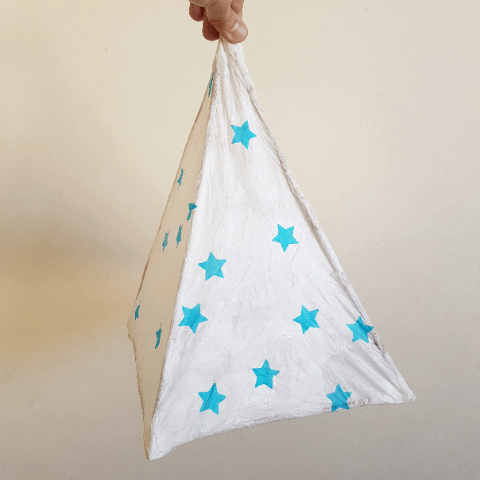
In the month of Ramadan lanterns are traditionally used as decorations, so this lantern will, God willing, make a lovely festive touch for Eid ul Fitr.
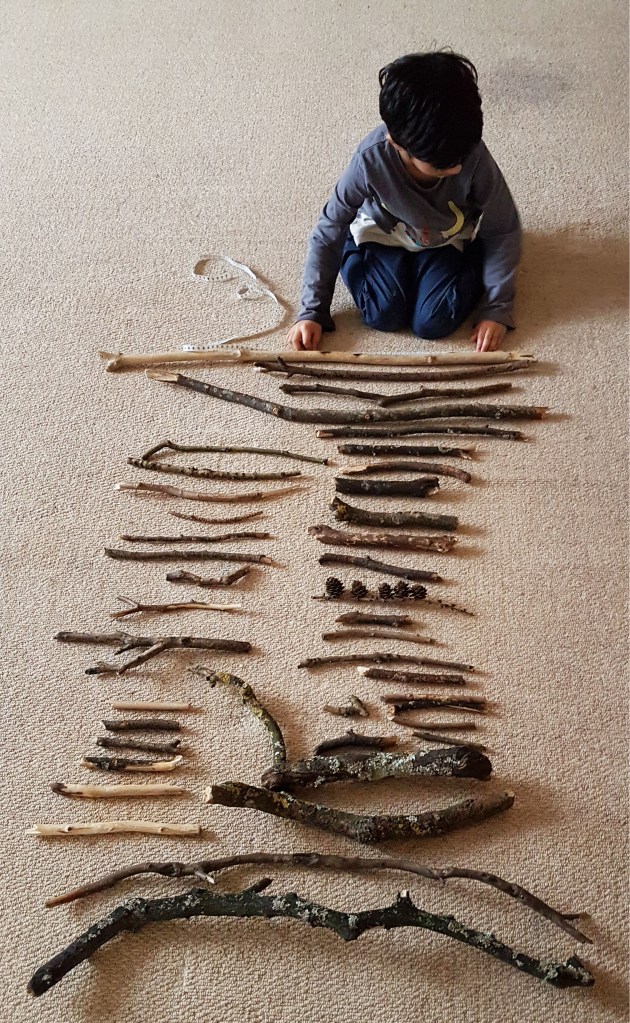
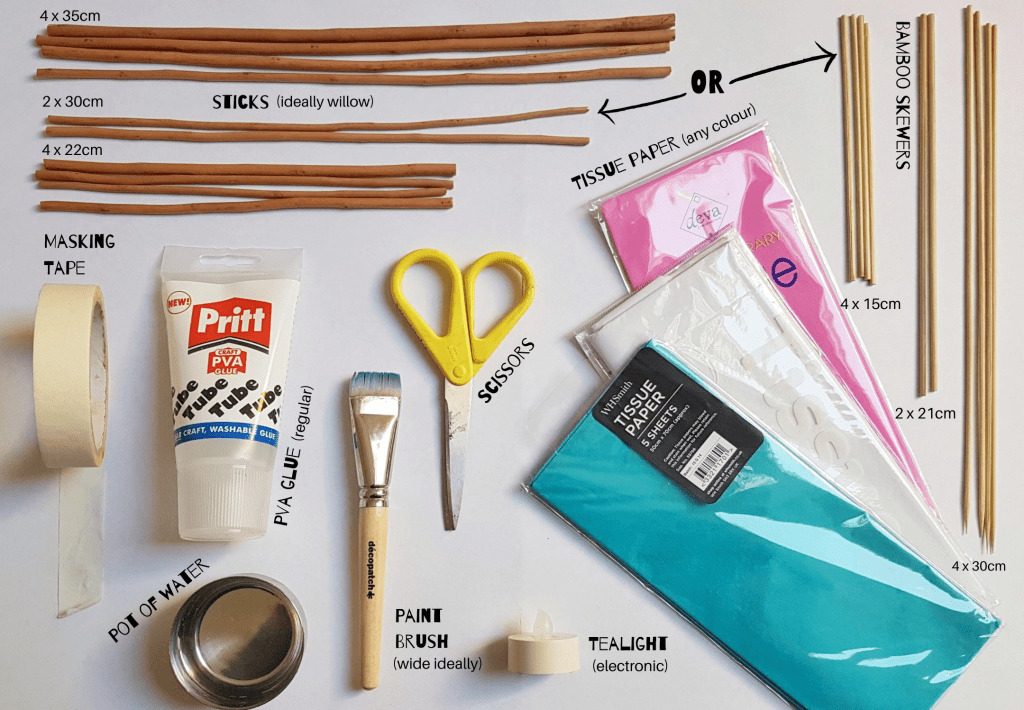
Ideally you need willow sticks for this though might not be possible for some so you can use sticks collected from your garden. Alternatively long bamboo skewers will work well.
Here’s the full materials list:
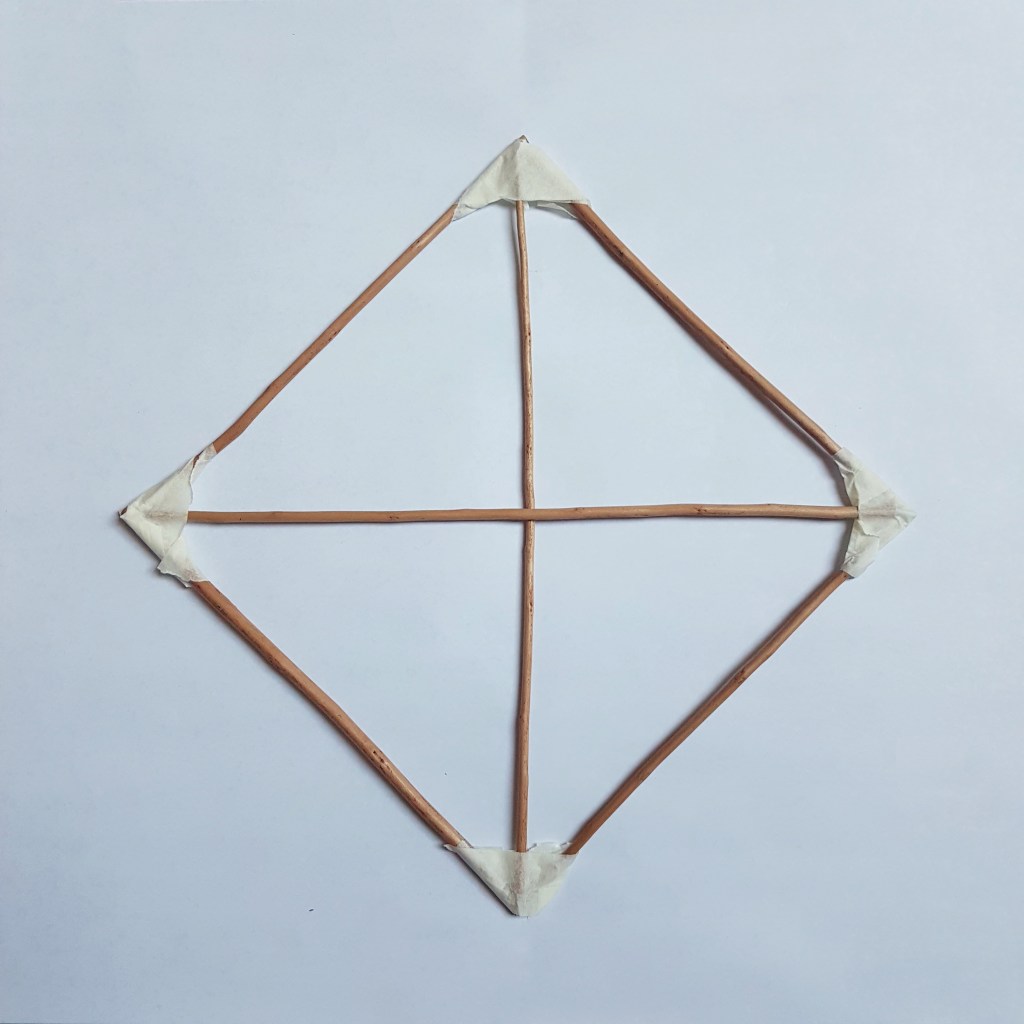
STEP ONE: MAKE YOUR FRAME
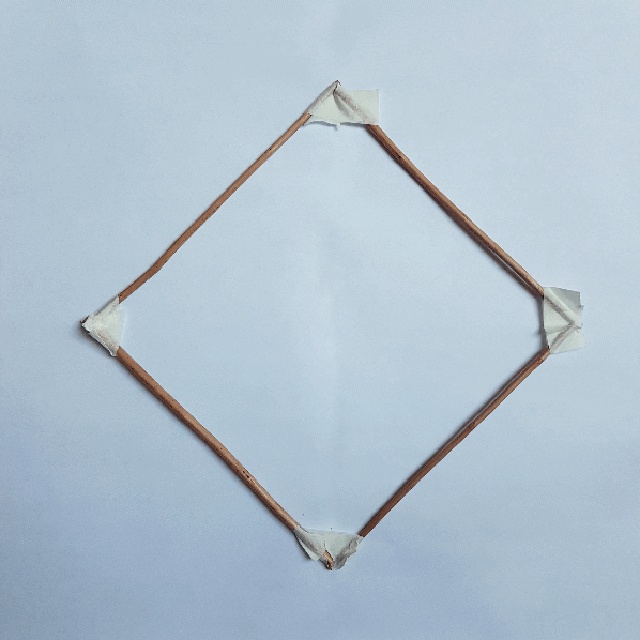
To begin constructing your frame use the smallest sticks to make a square. secure each side with a piece of masking tape.
Next place the medium sized sticks in the diagonal of the square and again secure with masking tape onto your square frame.

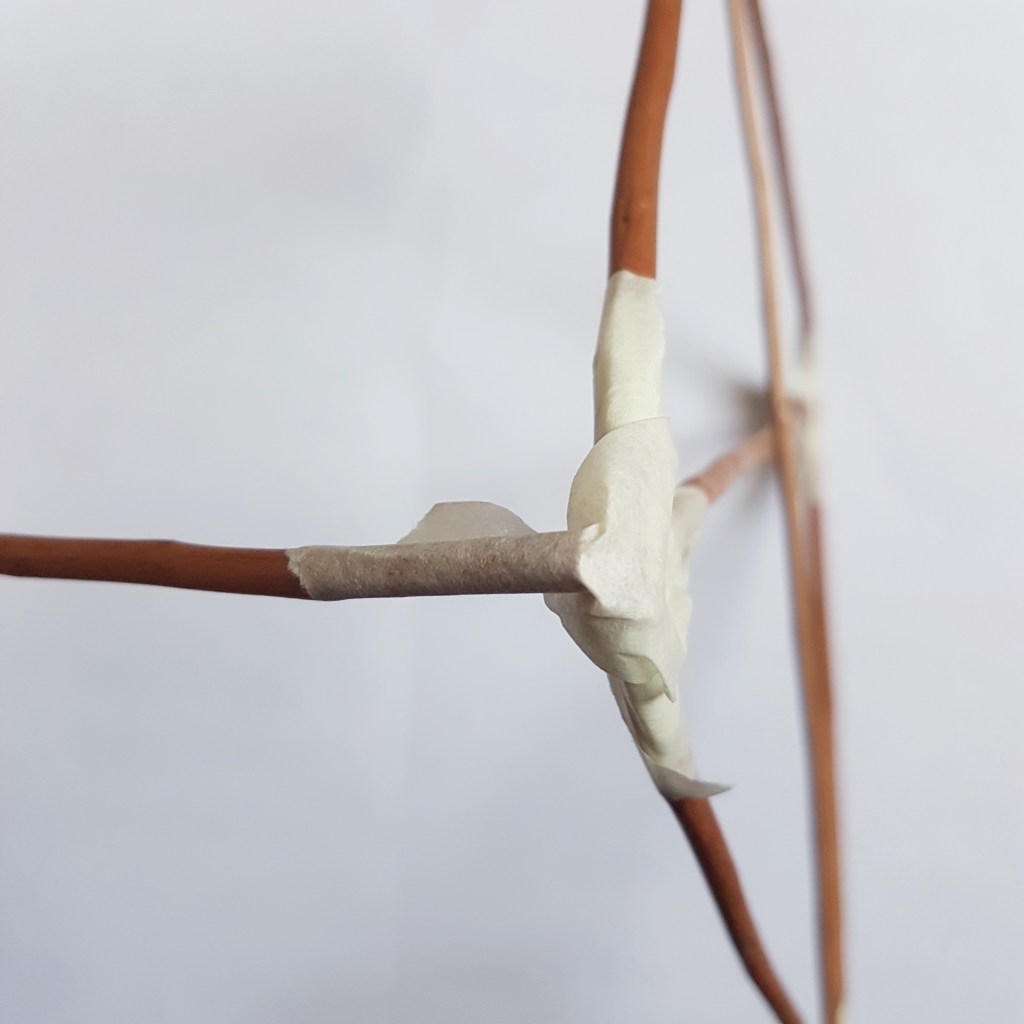
Now take a long stick and attach it upright onto a corner of the square frame. Attach another long stick to the opposite corner. Secure these two long sticks together. Repeat for the other two corners.

STEP TWO: COVERING THE FRAME
So now the fun part! Place a good amount of regular PVA glue into your pot and add some water (you can go up to 1 part PVA to 1 part water) to thin it down and make the glue even runnier.
Using your paint brush apply glue to a section of the frame and place small pieces of tissue paper to your frame. Brush the top of the tissue gently with more of the PVA glue mixture to secure it onto the frame.

Cover the entire frame with tissue paper, including the base. Leave the tissue to dry completely.
Repeat this process two more times so your frame has been covered in 3 layers of tissue paper.
TIPS
- Avoid using your finger to press the tissue one! The tissue will start to disintegrate so instead use your brush to gently press the tissue on.
- The first layer of tissue is the hardest to apply. If it gets too wet, leave the tissue to dry completely before resuming.
- When you are doing the base, turn the frame upside down and place the top of the frame into a tall tumbler. This will help avoid you touch the tissue wrapped frame which will still be wet.
- If you get a hole in the tissue paper, wait for the area to dry completely and then lightly apply the PVA mixture around the hole. Then apply a “plaster” of fresh tissue paper.
STEP Three: DECORATE!
I used a star punch to decorate my lantern with blue stars, but if you don’t have one just draw a star template onto stiff card and cut it out. Fold several pieces of tissue paper together and then cut through the tissue paper to get lots of stars.
Use some thinned down PVA glue to place the stars onto the tissue paper. Leave the lantern to dry completely.
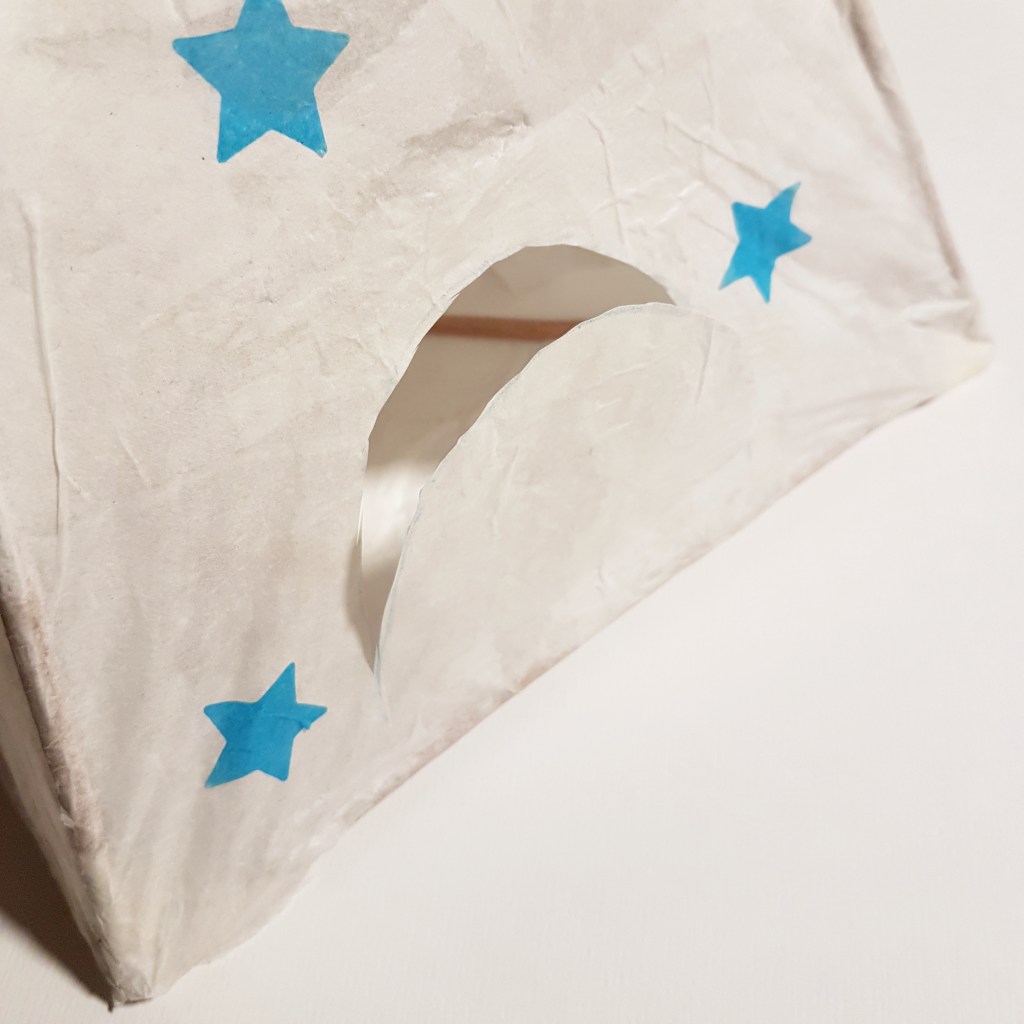
STEP FOUR: TEALIGHT TIME
So you should have your completed (dry!) lantern. Decide which side of the lantern is on the back and using sharp scissors cut an opening big enough to place the electronic tealight inside the lantern.
SAFETY WARNING!
If you do intend to use a real tealight please remember to put the tealight into a glass jar before placing them both into your lantern.

One Comment